
Up in under 90 seconds. Down just as fast.
Simple to pump up, even easier to pack away.
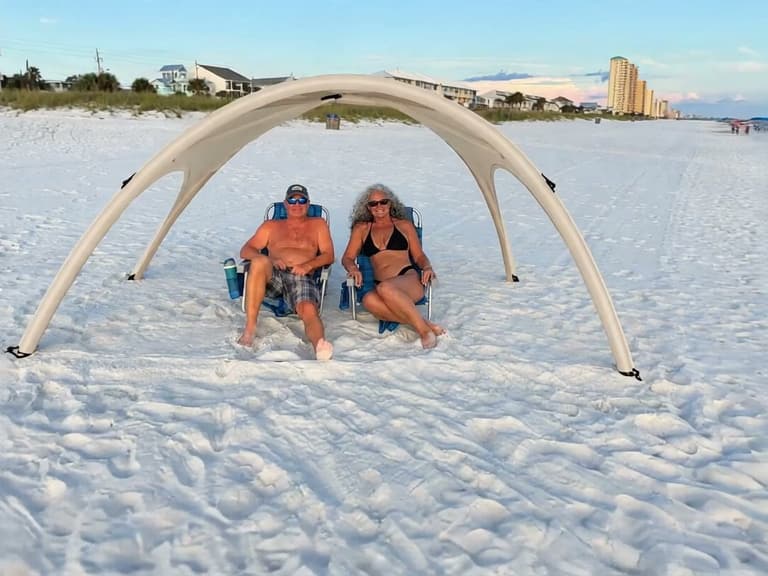
First frames
Two stills from the client’s walkaround clip. The remaining plates name the shots still to be taken.
Full front view
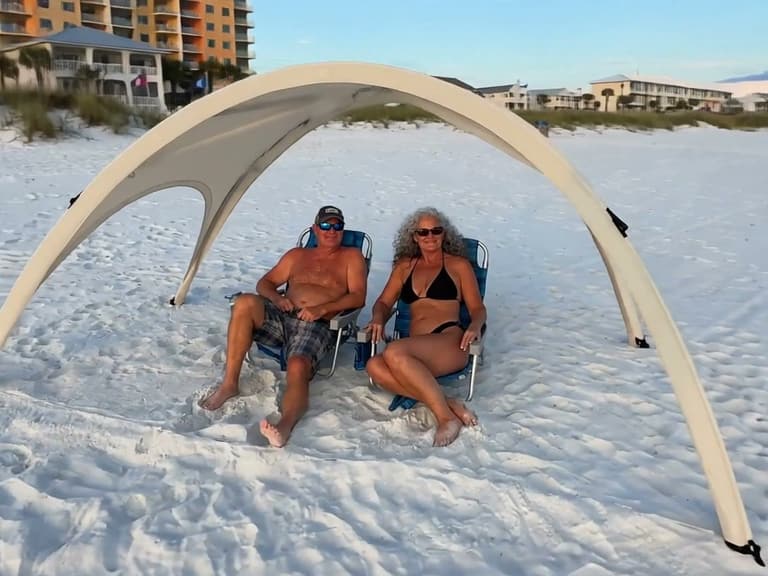
Three-quarter view
Backyard setup — to be shot
Studio product — to be shot
Shade Shack specifications
Measured values from product data. Anything still pending review shows as TBD.
| UV Protection | UPF 50 Fabric manufacturer spec |
|---|---|
| Coverage | 360° shade |
| Wind stability | Up to 20 mph |
| Water resistance | 2000mm |
| Setup time | Under 90 seconds |
| Inflation | Manual hand pump included, 6–8 PSI (green zone) |
| Weight | TBD Awaiting client confirmation |
| Size | 245" W × 104" D × 70" H |
| Packed size | TBD |
| Materials | Polyester canopy, Proprietary air-bladder tubing (up to 10 PSI) |
| Colors | Beige, White |
| Warranty | Lifetime warranty — exchanges facilitated; excludes punctures, tears, and broken zipper seals |
Setup steps
Simple to pump up, even easier to pack away. Shade Shack goes from bag to shade in under 90 seconds.
Time required: Under 90 seconds
Materials
- Included canopy
- Ground stakes
- Manual air pump
- Pump line
Unzip the carry bag.
Open the carry bag and set it where you will set up.
Remove the hand pump and attached air tube.
Take out the included manual hand pump and pump line.
Unfold Shade Shack fully flat on the ground, air channels facing down.
Lay the frame flat with the air channels oriented toward the ground.
Connect the air channel joints together via the velcro joist.
Join the air-channel sections with the velcro joist.
Locate the air valve. Place two stakes in the looping hooks at the base of the longer air channels.
Find the inflation valve, then stake the longer channels at the base loops.
Attach the pump’s air tube to the valve and inflate into the green zone — 6 to 8 PSI.
The pump’s green zone runs from 6 PSI at the low end to 8 at the top. Stay inside it; the tubing is rated to 10 PSI, which is headroom, not a target.
The frame will self-shape into its arch as it inflates.
Let the arch form as pressure builds — no poles to assemble.
Adjust the arch size or leg width manually by repositioning the stakes if needed.
Move stakes to dial in the footprint before final anchoring.
Secure the remaining feet with the loop hooks (an optional securing strap is included).
Anchor every foot so the canopy stays put in a breeze.
Enjoy the shade.
You’re set — under 90 seconds start to finish.
What's in the box
Optional add-ons available separately.
| Canopy | Included |
|---|---|
| Ground stakes | Included |
| Manual air pump | Included |
| Pump line | Included |
| Carry bag | Included |
| Elastic guy-lines | Optional add-on |
| Sandbags | Optional add-on |
| Stake hammer | Optional add-on |
| Phone holder with velcro strap | Optional add-on |
Ready to reserve yours?
Shade Shack's air-pump frame is built for real days outside — a full day at the beach, a tailgate, a pool afternoon, or a quick picnic at the park. Pump it up, stake it down, and it holds its shape and shade, wind or no wind. $142 on pre-order, regular $259. Pre-orders open Fall 2026.